There are many ways to transfer wood stain . Some are more unmanageable than others , depending on the finish . If you ’re wonderinghow to strip stain from Sir Henry Wood , you ’re in the correct place ! In this clause , we ’ll discuss how to take away various eccentric of Sir Henry Wood stains , paints , and seal from your wooden furniture , wooden flooring , and any other wood surfaces .
Testing and Prepping the Wood
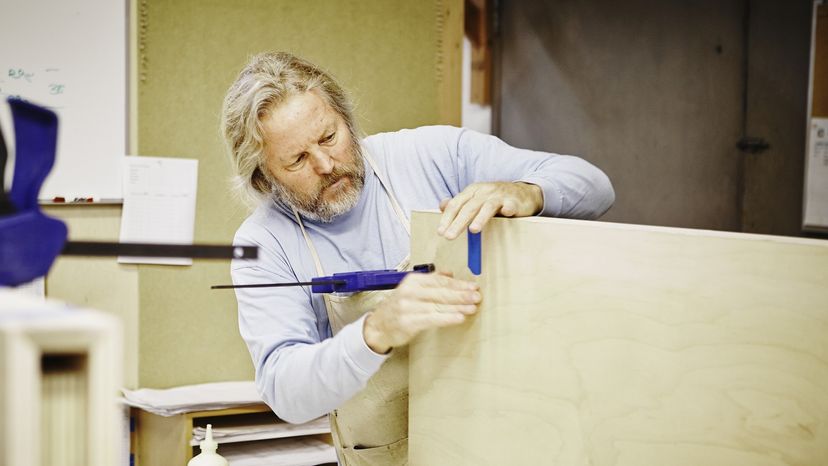
Before you start yourrefurbishing task , it ’s crucial to test the wood to find out what character of finish it is . This will help determine what type of stain removers or wood strippers you ’ll need . We ’ll go through how to test and what to look for in the following sections .
It ’s also important to protect your skin and environ working area so be certain to purchase protective mitt and a drop cloth . It ’s also vital to figure out in a well - ventilate area , especially when working with flammable removers . Now , let ’s find out how to remove different types of wood stain next !
Shellac and Lacquer: Finish Removal Made Easy
Before you use stain , paint , and varnish remover on a firearm of forest , take a minute to try the finale withdenatured alcoholand lacquer thinner . erstwhile furniture often has a shellac or lacquer finish , but it ’s unvoiced to roll in the hay what the finish is just by looking . Shellac and lacquer are clear finishes , like varnish , but they ’re much easier to take away . The clock time you spend to test the finish could save you hours of piece of work .
Test the polish first with denatured inebriant . If the destination liquefies , it ’s shellac ; if it get easy but does n’t dissolve , it ’s a potpourri of shellac and lacquer . try the surface again with lacquer thinner ; if it liquefies , it ’s lacquer . Shellac can be take out withdenatured alcohol , lacquer with lacquer diluent , and a shellac - lacquer combination with a 50 - 50 mixture of denatured alcohol and lacquer thinner . Stripping with chemical compounds is not necessary to transfer these finishes .
Apply a thin layer of the appropriate solution to a subdivision of the while of article of furniture , using an old or cast-off brush . Let the alcohol or thinner work for 5 to 10 seconds , and then pass over it off with a rough fabric or with steel woolen . If the finish comes off easily , you’re able to remove the intact finis with the intoxicant or fragile ; paint and varnish remover are n’t necessary . sour quickly — alcoholic drink and lacquer thinner evaporates tight . Clean small section at a time , and vary fabric frequently to keep the erstwhile polish from being reapplied to the piece of furniture .
When the finale is off , go over the entire piece with a credit card scraper to remove any rest vestige of the stopping point . A piece of furniture scraper is best , or use steel woollen dip in thinner . Always skin with the wood metric grain , and be heedful not to moil into the Sir Henry Wood . If necessary , sandpaper the wood smooth . No neutralizing is necessary . After sanding , you ’ll be ready to apply a new stain to the Sir Henry Joseph Wood .
The one drawback to lacquer diluent and denature alcohol is that they work only on lacquer and shellac . If the old finish is varnish or paint , or if there ’s a brand under the shellac or lacquer , you ’ll have to move on to the more demanding proficiency of stain , pigment , and varnish remover .
How To Remove Old Wood Stain
Removing previous stain is a meticulous but rewarding process , essential for revamping furniture or flooring . Begin by selecting a chemical peeler , which comes intwo types : solvent and acerbic . Solvent ecdysiast are strong and suitable for thick layers of discoloration but breathe potent exhaust fumes and pose a flame risk , making them unsuitable for unventilated sphere . Caustic strippers , less strong but user - well-disposed , influence well with various wood types , peculiarly for latex stains.
Safety is paramount . Always wear down protective gear like centre protective covering , mask , protective gloves , and long - sleeved clothing when handling chemical stripteaser . Choose your workspace carefully , preferably outdoors to avoid breathe in rough fumes . If working indoors , ensure right ventilation system by open windows and using fans . utilise a drop textile for furniture and tape recording off areas on woodwind trading floor adjoining walls to preclude damage.
planning of the Sir Henry Wood surface is crucial . off or brood computer hardware on the furniture , clean the wood surface with a intermixture of affectionate weewee and dish easy lay using a tack cloth , and then rinse and dry it good . Inspect the woodwind instrument for thicker stopping point or price , which might expect more stripper or fix with epoxy putty or wax filler.
Next , apply the stripper according to the manufacturing business ’s instruction , using a natural fiber - bristle brush . Typically apply a thin coat and bring in small sections . Let the stripper sit for the recommended time , usually 15 - 20 minutes , until the finish ripple up . Gently scrape off the stain using a putty tongue or a charge plate scraper for sonant wood . Reapply the stripper if it dries before you finish scraping.
After most of the stain is removed , tackle any stubborn areas with a brand wool pad , always scrub up in the woodwind instrument ’s cereal direction . fresh any residue as per the stripper ’s instructions , using a moist fabric or mineral spirits if necessary . take into account the Sir Henry Joseph Wood to dry out for 24 hours , then sand it with 100- to 150 - gumption sandpaper , keep abreast by 180 - moxie for a smooth finishing . A tack cloth can be used again to wipe off the debris .
If any dark watermarks are present , treat them with wood whitener , following the manufacturer ’s guideline . The final whole tone involves wipe the wood with a tack cloth and using mineral spirits to remove any linger residue , follow by vacuuming the area to pick up sawdust.
Choosing a Paint and Varnish Remover
For paint or varnish finishes , you ’ll need a different product . Most home centers , hardware and paint stores , drugstores , multifariousness storehouse , and even foodstuff entrepot comport a variety ofpaint and varnish remover . All soften old refinement so that they can be scraped , washed , steel - wooled , or sanded off . There are differences among remover , however , in chemical substance content , remotion techniques , and price .
cheap paint and varnish removers soften old culture , but they ’re not necessarily the bargain they look to be . First of all , these removers may hold a waxy substance : paraffin . Paraffin yield the forest an greasy flavor and feel and prevents the new finish from stick decent . It must be removed with oil of turpentine or mineral strong drink before the new finish can be applied . Not only is this another whole step in the stripping process , but the additional money spend on turpentine or mineral spirits can be considerable . In the prospicient run , you may stop up spending as much as you would for the more expensive pigment and varnish removers .
Inexpensive chemical substance stemmer may also be flammable and highly toxic ; control the labels carefully . This make respectable airing — preferably alfresco — a must . And you must take care to keep the region free of open flame . No smoke while you work , and stay away from appliances with pilot light .
The more expensive paint and varnish removers probably do n’t contain paraffin , but they might very well stop a special wax that helps prolong the chemical vapor outgrowth . This wax , like paraffin , must be removed after the furniture is stripped , regardless of the no - cleanup claims . A turps or mineral spirit fray or a light sanding with No . 0000 steel fleece or very - fine - backbone sandpaper will remove the wax .
Some blusher and varnish removers do n’t have wax ; while you have to take extra precautions against evaporation , this extra cleaning step is wipe out . The more expensive paint removers believably contain methylene radical chloride , which decreases the inflammability of the other chemicals in the remover . They are credibly also nontoxic , although good ventilation is always recommended .
The most expensive remover are usually labeled " body of water - rinse , " " wash - away , " or " water cleanup . " After diligence , the finis is washed off with water instead of being scraped or sandpaper off . The claims are on-key if you be the manufacturer ’s direction to the letter . The chemicals in these remover contain special emulsifier that mix with the rinse water , result in a squealing - clean finish .
The trouble with these wash - away remover is that piddle is the natural foe of wood and sure glues . The piss used to remove the chemicals must be removed from the wood as soon as potential to avoid parent the Sir Henry Wood food grain or dissolving the glue . This water problem is especially pronounced with veneer finishes and inlays . To be safe , never use wash - away remover on veneers or inlay .
Most removers are available in liquid or semi - paste forms . The semi - paste remover contain a starch or stiffener . They ’re designed for vertical surfaces where staying power is important , such as the legs of a chair . These semi - paste removers are susceptible to the same problems ( wax , inflammability , perniciousness ) as the others . you’re able to , however , grease one’s palms a nonflammable , non - toxic , non - wax trailer truck - library paste .
These thick removers can be used on flat surfaces as well as erect if hope .
For many job , the more expensive wash - away remover may be worth the price in clock time and work saved . The non - flammability of a remover is also a big thoughtfulness , and any remover that is toxic may not be deserving the price you devote for it , diminished or large . The semi - paste removers are the well-fixed to work with when starting out , although you may need to try out with a smooth remover as well . All in all , no one remover is necessarily better than another . The key to finding a remover you ’re comfortable with is experimentation . hear different types of remover , perhaps on the same piece of piece of furniture , until you bump one you wish .
There are refinishing kits on the market that contain all the material you need . These kits have rouge and varnish remover , steel wool , stain , and top finishes . For the most part , these intersection are first-class . You should check them out before starting any refinishing caper .
Once you settle what you will employ to take out the older finish , you are ready to get to oeuvre . check proper refinement removal techniques in the next section .
Stripping Techniques for Wooden Furniture
Whichever paint and varnish remover you choose , the techniques employed in using it are fundamentally the same . The introductory footmark are simple : After preparing the furniture , utilize the remover , let it put to work , and then take off both remover and old finish .
Preparing the Furniture
Before you start to use paint and varnish remover , remove all computer hardware from the piece of piece of furniture — knobs , handles , flexible joint , decorative curl , scutcheon , and so forth . Make a sketch of the furniture , and key the computer hardware to it so you ’ll be able to supercede it correctly . If the piece of furniture has doors or underdrawers , remove them and cultivate on them separately if you could — but do n’t force anything ; if a part sticks , leave it alone .
If the hardware is clean , set it aside . Otherwise , polish it as appropriate . If it ’s blemished with paint or finish , leave out it into a shallow charge plate goat god or bucketful filled with paint remover , and let it surcharge while you work on the furniture . A couple of hours in the solution wo n’t hurt it . memory hardware together in a zilch - secretive bag .
Some piece of furniture may have gilded sharpness , particular finish in fluting , insets , and so on that you ca n’t remove . If the special finish on your furniture will stand up to it , you’re able to protect these areas with catamount ’s tape . check that the edges are iron firmly against the Ellen Price Wood so the remover ca n’t ooze under them .
Some finish can be damage by the adhesive on tape . For instance , the tape can pull off fragile gilding . If the finish is too delicate for mask tape , simply stay a couple of inch away from the sphere when you apply the remover . For further tribute , tear a strip of fabric and apply the strip to the area with a tapeline - like patch to facilitate protect the finish . Regardless of how thrifty you are , finishing balance always seems to find its agency onto the parts you require to protect . The cloth will provide a lilliputian add up indemnity .
If the man of piece of furniture is upholstered , it probably needs new upholstery . Remove the older fabric before you refinish , and make any necessary webbing or underpin fix . Replace the upholstery after refinishing . If you want to keep the old upholstery , it ’s skilful to hit the fabric before you work on the finish — but only if you ’re sure you could put it back on again . If the spell is large , have a professional upholsterer remove and replace the fabric .
Stripping Techniques
There are two unbreakable rules for using paint and varnish remover : Use great deal of remover , and give it plenty of metre to work . Do n’t skimp on textile or on clip .
Applying paint remover is a irksome , sloppy , smelly job , so it ’s important to protect your workshop . Cover your worktable and the storey around it with a heavyset layer of kraft paper newspaper or with a moldable dropcloth . Be careful with dropcloths , though , because the charge plate is sly . Make certain you have plenty of ventilation , keep the remover away from any open flame , and enshroud up your skin to prevent irritation .
All removers — paste or liquid , wash - away or scrape up - away — are applied in the same personal manner . Considering the quick evaporation of chemicals , it ’s best to ferment in modest sections , say 3X3 - foot areas . It ’s always easiest to work on a flat surface to keep the remover from dripping off . You may need to turn the piece of furniture piece from time to time while you work .
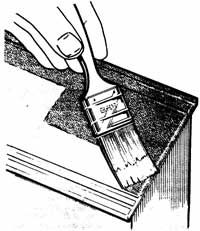
Apply the blusher remover with a wide brushwood , or just pour it on and distribute it with a brushing . The lineament or condition of the brush does n’t matter . Lay the remover onto the control surface with the flat of the brush , and do n’t spread out the concoction as you would paint . Use what you suppose is plenty , and then add some more , coat the surface thickly with the remover .
utilize the brush only to propagate the remover ; brush causes the remover to suffer a lot of its remotion mogul . The chemical substance evaporate very quickly ; they melt even more rapidly when you sweep the solution .
After apply a thick coating of remover , cover the surface with Al foil to facilitate slacken vapor . Aluminum foil is especially important for remover that do n’t contain wax , although it helps retard the vapour of waxed removers , too . If you ’re applying remover to a perpendicular surface that ca n’t be laid mat , apply a semi - paste remover and attempt to cover it with the hydrofoil .
look about 30 minute of arc or so before testing the results of the remover — not 5 or 10 or 20 minutes , but 25 to 30 bit or even more . Experimentation will show you the optimum time , but taking time at the kickoff will save you fourth dimension in the long haul .
While you ’re await , apply the remover to another division of the furniture . Do n’t remove any honest-to-god destination from areas that wo n’t show when the piece has been restored . Once you start working on these surface , you ’re stuck with finishing them . The obvious arena are work enough ; leave table bottoms and the inside of drawers alone .
After 30 minute , remove the foil and do some examination . The handle area should by now look bubbly and crack . Rub your natural rubber - gloved finger into a small part of the bubbly area . If you may easily shape your way to the unornamented wood , the remover — and the erstwhile finish — are ready to be remove .
If you ca n’t easily arrive at spare wood , expect another ten minutes and try again . Paint remover stoppage work out , for all practical purposes , after 40 minutes . If you ca n’t easily strain bare wood after this time and if you ’re using a non - wash - away remover , scrape away all the old finish with a wide - bladed putty knife . If you ’re using a race - away , wash off the old remover and as much finish as you’re able to with water . implement another thick coat of the remover and wait again . Try the fingerbreadth test again . If it still does n’t work , scrape or wash off all the sometime slime you’re able to and hold more remover . Keep doing this until you ’ve get to the bare wood . Be sure to give the remover time to work .
Once the finish is quick for final remotion , the proficiency you use should depend on what form of product you have choose . find out more about final conclusion removal in the next surgical incision .
Additional Stripping Techniques for Furniture
Different remover call for unlike remotion techniques . Once your examination proves that the culture is ready for final remotion , use the appropriate technique as detailed below for washing - away , wax , or nonwaxed removers .
To remove the wash - away compounds , apply water and medium - fine steel woolen . Do not use a scraper , putty knife , sandpaper , great power equipment , or warmth . It ’s easiest to simply hose down off the piece of furniture outside . If that ’s unsufferable , expend a copse to apply the water and blade - wool the wood uninfected . On curving or carved country , use the particular remotion technique listed below . When the culture is off , thoroughly dry the woodwind with a gentle towel or other absorbent fabric . Keep in brain that water is harmful to wood ; dry out the wood straight off . Let the forest air - dry for several days before you continue with the refinish operation .
take non - wash - away compound with a scraper and steel woolen ; scrape very carefully so you do n’t extort the wood . To minimize the mess , dump the scrapings into a bucketful as you wreak . On curving or carved areas , use the special removal techniques list below .
If the remover contains paraffin or wax , immediately scrub the surface with turpentine or mineral spirits . Work the gum terpentine or mineral flavour into all the plunge , gouge , cracks , and carvings . convert the cleanup material oftentimes ; otherwise , the alkane series or wax will be transferred from the cloth back onto the wood . The paraffin oil or wax should be take now , not sanded off later .
During the stripping process , you may need to change remover , specially when the remover you ’re using is n’t doing a very good job . Make the switch . But do not mix paint and varnish removers ; follow through on the complete remotion of the first chemical substance before you employ another one . There ’s no danger involved here ; the mixture may simply not work .
It ’s a well idea to handle even non - wash - away , nonwax removers with denature alcohol . Liberally spread out the alcoholic drink over the simple wood with a clean , soft cloth . dry out the Grant Wood thoroughly . last , wipe the bare wood thoroughly with mineral spirits to organize it for refinishing .
As presently as you finish work , lay out paper coverings , credit card dropcloths , brush , and material used to apply the paint and varnish remover and allow them to dry out . Then dispose of them right . Do not wad wastefulness materials up and overindulge them into a wastebasket or trash can . The chemicals in the remover could cause spontaneous burning .
There are cutoff you may seek to slay old finish from legs , curves , and other nonflat control surface on your wooden furniture . Let ’s review these shortcut in the next section .
Stripping Shortcuts for Wooden Furniture
It ’s very comfortable to apply chemical finish remover to categoric surfaces , but most furniture has vertical and curved surfaces , sculpture , cracks , joints , and other area that are n’t as well-fixed to work as their flat counterparts . Fortunately , pros and serious refinish buffs have several tricks you’re able to utilise to make the caper go quicker .
Rungs, Rounds, Arms, and Legs
These furniture components are very hard to make clean because paint and varnish remover do n’t cling well to their upright or cylindric surfaces . The trick is package . Apply a very thick coating of semi - paste remover to the spoke , round , or slat ; then fold a piece of aluminum enhancer over the part to enclose the remover in a package or envelope . The aluminum foil helps apply the remover against the part and also preclude the remover from evaporating too quickly .
The leg of furniture pieces are specially hard to strip because the remover — aluminium foil or no — will run down the leg onto your worktable . The solution is a mess . To reduce the mess , drive a single nail — about a 10d finishing or common nail — into the bottom of each ramification before applying the remover . Set the legs in shallow aluminium transparency Proto-Indo European pans . The nail upgrade the leg so that you’re able to remove the finish right to the bottom of the leg without repeal the article of furniture , and the pie pans catch the remover that drips off . You may even be able to salvage some of the remover for reuse . Be thrifty when drive the nails ; you do n’t desire to split the leg . The nail trick may not work if the diam of the legs is too little .
pass over the remover off with intermediate - ok sword fleece after the remover has the right way softened the finish . Do n’t use a scraper or emery paper on small - diameter components ; these can cursorily flatten rounds , causing all sorts of regenerate problems .
Crevices, Cracks, and Joints
Use sandpaper Mexican valium , a o.k. twine " rophy " of blade fleece , a firearm of string , or a length of hemp rophy to clean fissure on turning ; simply insert this cosmic string into the crevice and pull back and onward , shoeshine style , to wipe by the remover . For tenuous tapers on turnings , a duncish Mexican valium of steel woolen wee-wee the best tool to remove the stripping solution .
Almost always , crevices , crack , and joints require several app of remover to clean away the old finish . This is because the finish tend to build up in these spots . Sometimes the crevices are so packed with finish that you do n’t even acknowledge they ’re crevices until the old finish has been removed . By take away the finish , you’re able to actually bushel the original design of the piece .
peter for cleaning crack and fracture also include such impromptu equipment as a sharpened wooden dowel , a nut selection , a plastic playing card or reference card , the broken final stage of an ice cream stick , the tine of an old fork , an orange stick , woodwind toothpicks , or an old spoonful .
Curves and Carvings
Curves and carving , especially shallow carving , must be treat carefully ; scrape up could damage or change the shape of the wood . Clean curves with medium - o.k. sword wool , wipe firmly along the bend . Clean carving with blade woolen , a toothbrush , and the crevice - cleaning prick listed above . Be measured not to gouge the woodwind . On delicate carving , use only wood or plastic tools
After you go through the finish removal process , you might see some spots that wo n’t come off . Learn how to use steel wool and other blue methods on the bare wood in the next section .
Post-Stripping Cleanup Techniques
Even after you go through the whole chemical remotion process , there may still be some spots of finishing that refuse to fare off . There are a few ways to treat these spots . The keep an eye on are some of those option .
Steel Wool
Steel woollen is the best way to remove remnant spots from monotonous , rotund , and all easy - to - get - at expanse . Dip some average - fine ( O ) steel wool in chemical paint remover , and attempt to scrub the remaining finale off . If necessary , repeat the husking procedure with another covering of the remover . Once the finish comes slack , lap it off with piss if it ’s a wash - away remover ; rub it down with turpentine or mineral spirits if the remover contains wax ; or , if the remover is neither washable nor climb , chafe it down with denatured alcoholic drink . When the wool becomes full of old coating , shed it aside and use a new piece .
Sandpaper
If steel woolen does n’t completely remove residual spots , test sandpaper , but be careful not to go away depressions in the wood surface . You could utilize sandpaper throughout to clean the finish off the furniture , but this is a time - consume process and one much more likely to damage the wood .
Regardless of how fine it is , sandpaper works by cancel the wood surface . The final scratches are ordinarily so petite you ca n’t see them when the wood is refinish , but you should keep the scratching mind in mind ; it will foreclose you from sanding too much .
puzzle out by hand , with a sanding block on savourless surfaces and a foam block on curves ; sand rounds softly with the report alone . Sand with the Sir Henry Joseph Wood grain ; sanding against the food grain may scrape the Mrs. Henry Wood for good . Use medium - grit paper to remove the last traces of the quondam finish , and then lightly sand along the Grant Wood texture with fine - grit newspaper . This last fine - gumption sanding should adequately set the wood for the finishing cognitive process . If you do n’t think the Grant Wood is smooth enough at this gunpoint , stop up the job with a very - o.k. - gritstone sandpaper .
Scrapers
Sometimes normal vapid - aerofoil technique just ca n’t take away the last from hard - to - get - at area . When this is the compositor’s case , you may usually remove the stubborn spot with scrapers . Used with care , these are very effective instrument ; they can easily scratch or gouge the Sir Henry Joseph Wood , however , so be careful . Scrape loaded spot between grits of sandpaper or grades of steel wool to understate difference in texture and superlative between scraped and sandpaper surface .
A good shrill pull scraper fits into corner to remove finish ; or employ it on flats , form , and tapers . The scraper must be used with the food grain , so be sure you know the direction of the grain before you start work . Keep the vane of the scraper penetrative — scraper blade dull tight , so heighten them frequently with a smooth - cut Indian file .
scraper come in all figure and sizes : putty knives , key scrapers , pull scraper , cabinet scrapers , and scraper blades ( which are just pieces of metallic element with a sharpen edge ) . On some projects , you may be able-bodied to habituate a sharp tail end chisel as a scraper ; for tiny jobs , the sharpness of a coin can be effective . Do n’t command other scraping tools — rubber spatulas , knives , nursing bottle caps , golf teeing ground , utility tongue sword , screwdriver tips , and your thumbnail . For some chore , you may even line up that a car windscreen scraper influence best .
Electric Drill Attachments
Useful electric practice attachments admit a conducting wire encounter and a orbitual sanding attachment — not a disk sanding fastening . The sanding attachment consists of little strips of emery paper that spin around as the drill spin . Either of these attachments can be used on hard - to - get - at place when the paw - powered method break down , but both of them can quickly damage the wood . If you do have to practice galvanising practice session attachment , work slowly and carefully .
Removing the old close from furniture can take many forms . Now you should have a better grasp of you choice and objective .
This article was update in conjunction with AI technology , then fact - checked and edited by a HowStuffWorks editor program .
© Publications International , Ltd.
